
......................................................................
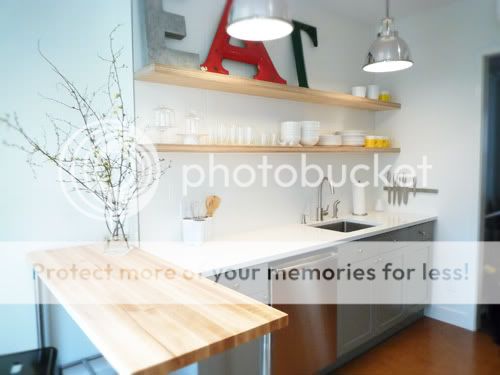
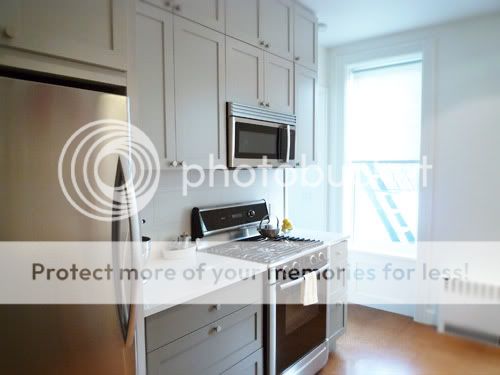
well...it's pretty much done. we started this kitchen/bathroom renovation on december 3rd and pretty much finished a little over 3 months later (to be expected i guess). aside from some art to buy and a clock (more on that later) here's some "complete" photos of our new gorgeous kitchen.


Looks AMAZING!!!!
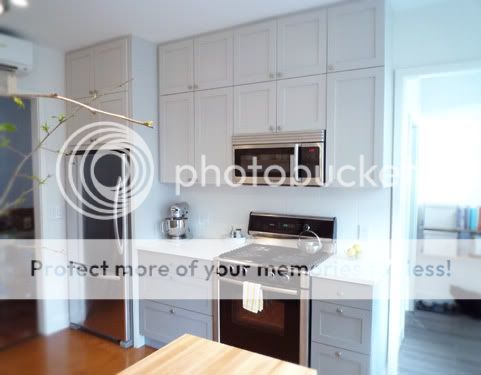
ReplyDeleteIt looks great. What appliances are those particularly the stove?
ReplyDeletethe stove is a Bosch that we had before starting the reno. I can't say i'd recommend it though :-(
ReplyDeletei find some of the knobs etc to feel a little plastic-y and cheap...and this range was not cheap.
thanks for looking!
hi - would it be possible for me to call you re: your experience w/Mentor? looking into kitchen and master suite/bath reno. tks!
ReplyDeleteOf course! I'm truly glad to recommend him.
ReplyDeletesend me an email and i'll send you my phone number...just don't want it up for the world to see :-)
jackielnx@gmail.com
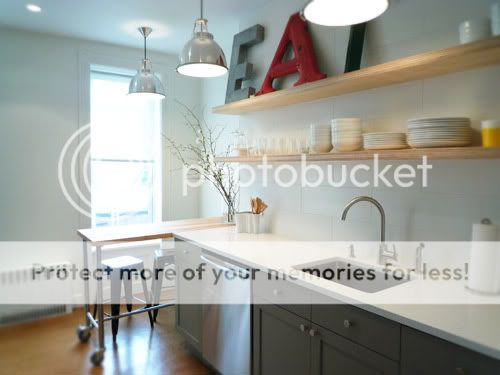
I love love love the dove grey. Beautiful kitchen space
ReplyDeleteDo you mind my asking where you got your cabinets? I love them!
ReplyDeleteCatee:
ReplyDeletethe cabinets are from Scherr's Cabinets & Doors : www.scherrs.com
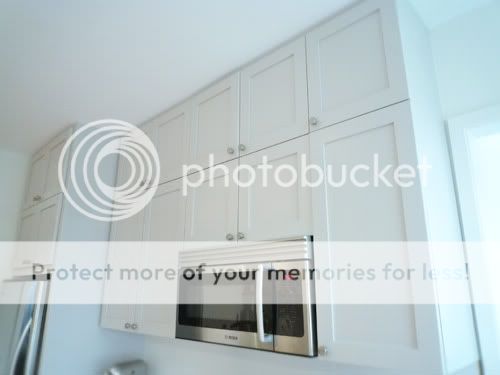
We were originally thinking of going the ikea route... but wanted boxes that are made better, sizes that actually fit our kitchen and everything painted gray. The solution? Scherrs Ready to Assemble cabinets from North Dakota! I can't say enough about what a great decision this was. We got FULLY CUSTOM cabinets painted a color of our choice for an unreal price...along with some of THE BEST customer service i've ever encountered. I'm not kidding. Scherr's built RTA cabinets based on our architects drawings, with a few rounds of shop drawing revisions, delivered everything flat and we assembled (as easy as ikea only with better materials). There were a few doors that needed to be redone based on our error... they gladly redid them and worked with us when i even wanted to switch all of our drawer glides...and credited me for the ones i returned. Truly amazing people to work with. And the price was bananas for the full custom cabs we got.
They even created some funky pieces based on my ideas like sheet pan slots etc., pullouts, and extra storage above the fridge.
they are true craftsman and the nicest people.
WHICH Scherr's cabinet door did you use? Many of us are looking to replace Tidaholm, which has a thiner stile than most. Can you tell specifically which door style you used?
ReplyDeleteHi-
DeleteWe used the 400 shaker doors with the 540 drawer front style.
Love your kitchen! It's been our major design inspiration since we started planning our remodel last summer!
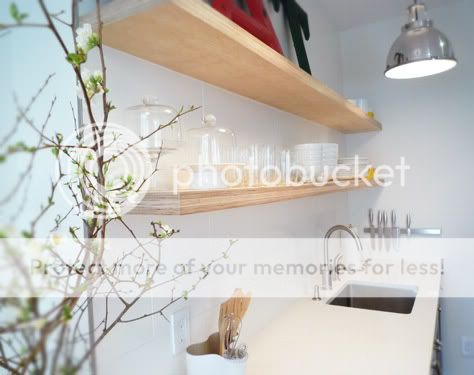
ReplyDeleteI'm wondering if you would share how those floating shelves are attached to the wall? We're planning to have several shorter floating shelves, but solid wood - so a little heavy - and they need to be strong enough to support mason jars with dry goods in them...
We have a problem in that the long kitchen wall in our 1928 townhouse (in Norway) basically doesn't have studs. It has a thin plank wood wall (behind the thin plywood that we stripped off), then a gap, then the original brick wall. So even though we will put drywall over the plank wall, we will have nothing substantial to screw a long rod into. I'd love to hear how your shelves were mounted...
Peace,
Yael
hi-
ReplyDeletethanks so much for the lovely complement...from so far away!
if you look at the this post i explained a bit how we dealt with the hidden support for the shelves:
http://designsmitten.blogspot.com/2011/01/s-h-e-l-v-e-s-i-n-p-r-o-g-r-e-s-s.html
i wish i had a few more descriptive 'before' images but basically we installed L shaped iron brackets to the studs...then came the wall board and tile over it. the shelves themselves were notched in the back so they slip onto the brackets like a sleeve. it took some trial and error but it all worked out in the end!
good luck with your project. if you'd like to send your email address with more questions i'd be happy to answer any more!
Hi Jackie, I saw your post on Brownstoner.com in 2011 and saved the photos as inspiration for my own reno. Two years later, it's happening! Question: what color gray did you use for the cabinets (if you remember)? I'm having trouble deciding between Sherwin Williams colors for my own Scherr's order. Many thanks and I hope you're enjoying your lovely kitchen!
ReplyDeleteHi fawn-
ReplyDeleteHow exciting to finally start right? (and super scary!).
We used 'dovetail gray' for the lowers (which is the darker gray) and 'repose' for the uppers. I think they're 3 swatches apart on the same card from Sherwinn Williams.
Scherr's were just such great people to work with...i hope they're the same for you. they tirelessly made modification, after modification on our shop drawings. And they created some really killer custom pieces for our kitchen. The vertical rack for cutting boards, sheet pans above my fridge is my pride and joy.
feel free to email me with any other questions :-)
jackielnx@gmail.com
Thank you!
DeleteGorgeous kitchen! about Scherr's. how are the cabs, and painted finish holding up 2 years later, any thoughts to share?
ReplyDeletethe paint is still looking perfect! there's some cabs that get more abuse than other (the garbage/reccycling drawer) but a quick wipe-down and it's good as new.
ReplyDeleteThis comment has been removed by a blog administrator.
ReplyDelete